
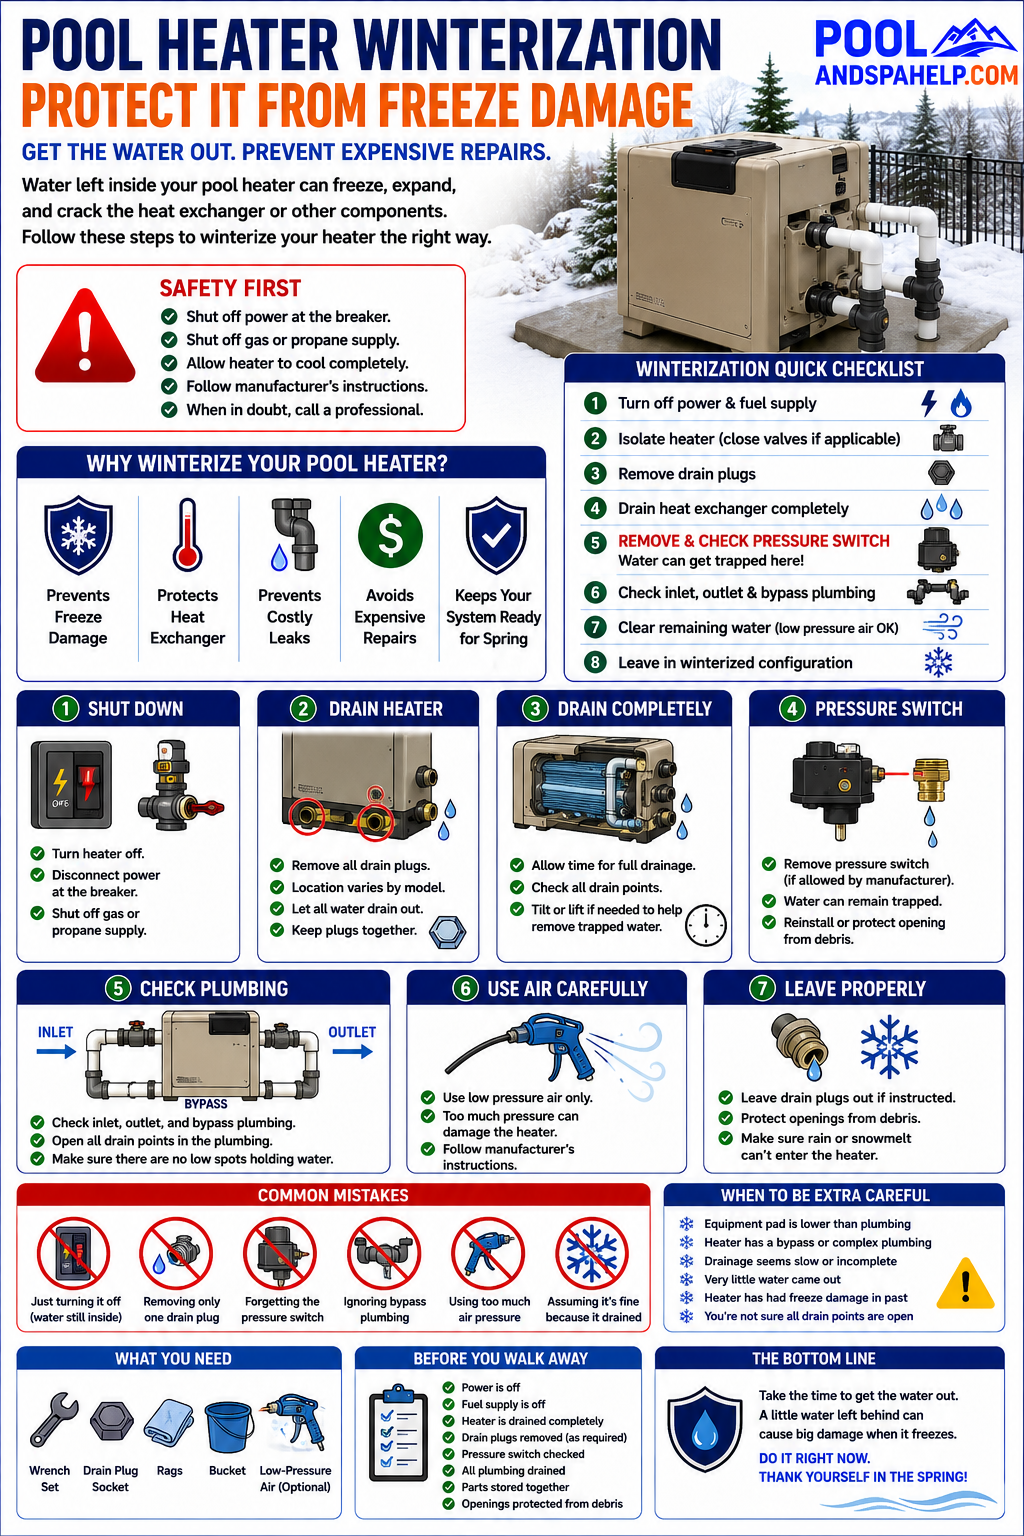
A pool heater can be one of the most expensive pieces of equipment in your pool system—and it doesn’t take much trapped water to cause serious freeze damage.
When water freezes, it expands. If water is left inside the heater’s heat exchanger, plumbing, pressure switch, or other small passages, that expansion can crack components that were perfectly fine when the pool was shut down.
The important part of winterizing a pool heater isn’t simply turning it off.
You need to get the water out.
And there’s one spot I see people overlook: the pressure switch. Water can sometimes remain trapped around the pressure switch even after the rest of the heater has been drained.
Here’s how I approach pool heater winterization.
Quick Summary: Shut off the heater’s power and fuel supply, isolate it from the pool system if applicable, remove the heater’s drain plugs, drain the heat exchanger and plumbing completely, and check for water trapped at the pressure switch. On heaters where the pressure switch can safely be removed, taking it out can allow trapped water to drain.
Safety First
Before working on a pool heater:
- Shut off electrical power to the heater.
- For gas or propane heaters, shut off the fuel supply.
- Allow the heater to cool completely before draining it.
- Never work on gas controls or electrical components unless you’re qualified to do so.
- Follow the winterization procedure specified by the heater manufacturer.
Pool heaters vary considerably by manufacturer and model. Drain-plug locations, pressure-switch arrangements, bypass systems, and winterization procedures aren’t universal.
If your owner’s manual specifies a particular procedure, follow it.
Pool Heater Winterization: What You’re Trying to Accomplish
The goal is simple:
Leave as little water as possible inside anything that can freeze.
That includes more than the obvious inlet and outlet plumbing.
Depending on the heater, water may remain in:
- The heat exchanger
- Headers or manifolds
- Internal plumbing
- Drain fittings
- Low spots
- Bypass assemblies
- Pressure-switch passages
A heater can appear completely drained while still containing a small pocket of water somewhere inside.
That’s why I don’t consider a heater winterized just because water stopped coming out of the main drain plug.
Step 1: Shut Down the Heater
Turn the heater off using its normal controls.
Then disconnect electrical power at the appropriate breaker or disconnect.
For a gas or propane pool heater, shut off the fuel supply according to the manufacturer’s instructions.
Don’t rely solely on the heater’s control panel being turned off.
Step 2: Shut Down the Pool Circulation System
Turn off the pool pump and make sure it cannot unexpectedly start while you’re working on the heater.
If you’re winterizing the entire pool, you’ll normally be draining and clearing the rest of the circulation system at the same time.
If valves allow the heater to be isolated from the rest of the plumbing, position them according to the manufacturer’s winterization procedure.
Step 3: Remove the Heater Drain Plugs
Locate the heater’s winterizing or drain plugs.
Their number and location vary considerably between heaters, so don’t assume you’ve found them all just because you’ve removed one.
Check the owner’s manual for your specific heater.
Remove the appropriate drain plugs and allow the water to drain completely.
Technician Tip
Keep track of every plug you remove.
One method is to place the plugs together in a labelled bag and store them somewhere obvious near the equipment. You don’t want to discover a missing drain plug when you’re trying to start the pool in spring.
Step 4: Make Sure the Heat Exchanger Is Actually Drained
This is the important part.
Removing a drain plug doesn’t necessarily mean every bit of water immediately leaves the heater.
Water can remain trapped because of:
- The heater’s internal plumbing layout
- Low spots
- Debris
- A partially blocked drain
- The position of the heater
- Internal components that create small pockets
Give the heater time to drain.
If the manufacturer’s instructions specify additional drain points or procedures for clearing the heat exchanger, follow them.
Don’t assume “nothing else is coming out” automatically means “there’s no water left.”
Step 5: Don’t Forget the Pressure Switch
This is one of the things I specifically check when winterizing a pool heater.
The pressure switch senses water pressure or flow through the heater and helps prevent the heater from operating without adequate circulation.
But depending on the heater’s design, water can remain trapped in the pressure-switch fitting or passage.
I’ve seen this overlooked during winterization.
On heaters where the pressure switch is designed to be removable and the manufacturer’s procedure allows it, removing the pressure switch can release water that didn’t come out through the normal heater drain.
You may be surprised to see additional water come out.
Why This Matters
It doesn’t take a large amount of trapped water to create a problem.
A small pocket of water can freeze, expand, and damage the pressure-switch fitting, plumbing, or surrounding components.
That’s why I don’t like assuming the main heater drain took care of everything.
Important
Don’t blindly remove a pressure switch from every heater.
Check the manufacturer’s procedure for your particular model first. Some designs are different, and unnecessary removal can damage fittings, wiring, threads, or seals.
If the pressure switch is removed for winterization, protect the opening from debris and make sure the switch and any associated sealing components aren’t lost.
Step 6: Check the Heater’s Inlet and Outlet Plumbing
Water can also become trapped around the heater’s inlet and outlet connections.
This is particularly important if the equipment pad has plumbing that creates low spots where water cannot naturally drain.
When winterizing the pool plumbing, make sure the heater isn’t accidentally creating a section where water remains trapped.
If your system has a heater bypass, check that plumbing as well.
Step 7: Be Careful With Compressed Air
Compressed air is commonly used to clear pool plumbing, but more pressure isn’t better.
Pool equipment isn’t designed to withstand unlimited air pressure.
If the heater manufacturer allows air to be used during winterization, follow its procedure and pressure recommendations.
Don’t simply connect a large compressor and blast full shop pressure through the heater.
You can damage components or create a dangerous situation.
Step 8: Leave the Heater in Its Winterized Configuration
Once you’re satisfied that the heater is drained, leave it configured according to the manufacturer’s winter-storage instructions.
Depending on the heater, that may mean leaving certain drain plugs removed during the winter.
The important thing is preventing water from collecting inside the heater again.
Also make sure rain, snowmelt, or runoff from the equipment pad can’t easily enter open plumbing or components.
What About Pool Antifreeze?
Don’t automatically pour pool antifreeze into the heater.
Pool antifreeze can be useful in certain parts of a winterized pool system, but the heater should be handled according to its manufacturer’s instructions.
The better objective with the heater is generally to remove the water rather than depend on antifreeze to protect trapped water.
Never use automotive antifreeze in a pool system.
Common Pool Heater Winterization Mistakes
Only Turning the Heater Off
Turning off the heater prevents it from operating.
It doesn’t prevent freeze damage.
Water still needs to be removed.
Removing One Drain Plug and Calling It Done
Some heaters have multiple drain points, and water may remain trapped elsewhere.
Check the manual for your exact model.
Forgetting the Pressure Switch
This is an easy one to miss.
Even when the main part of the heater appears drained, water may still be trapped around the pressure switch or its passage.
Forgetting the Bypass Plumbing
A heater bypass can create additional places for water to collect.
Treat the entire heater plumbing circuit as part of the winterization process.
Using Excessive Air Pressure
More air pressure doesn’t necessarily remove more water.
It can damage equipment.
When I’d Be Extra Careful
I’d spend additional time checking the heater if:
- The equipment pad sits lower than part of the pool plumbing.
- The heater has complicated internal plumbing.
- The heater has a bypass.
- Drainage seems unusually slow.
- Very little water came out when you expected considerably more.
- The heater has previously suffered freeze damage.
- You’re not sure whether all the drain points have been opened.
If something doesn’t make sense, don’t assume it’s fine because the rest of the pool has been winterized.
Before You Walk Away
Once you’ve finished, do one final inspection.
Make sure:
- Power is off.
- Fuel is shut off where required.
- The heater has been drained according to the manufacturer’s procedure.
- All required drain plugs have been removed.
- The heat exchanger and internal plumbing have drained.
- The pressure-switch area has been checked for trapped water.
- The inlet, outlet, and bypass plumbing have been winterized.
- Removed plugs and components are stored safely.
- Openings are protected from debris where appropriate.
Five extra minutes checking the heater is cheap insurance compared with replacing a freeze-damaged heat exchanger.
Frequently Asked Questions
Do I really need to winterize my pool heater?
If the heater will be exposed to freezing temperatures, yes. Turning it off isn’t enough because water remaining inside the heater can freeze and damage internal components.
Where are the drain plugs on a pool heater?
It depends on the manufacturer and model. Check the heater’s owner’s manual rather than assuming there’s only one drain point.
Why is there still water in my heater after removing the drain plug?
Internal passages, low spots, plumbing configuration, and components such as the pressure-switch fitting can trap small amounts of water.
Should I remove the pressure switch when winterizing my pool heater?
On some heaters, removing the pressure switch can help drain water trapped in its fitting or passage. However, heater designs differ, so check the manufacturer’s winterization instructions before removing it.
Can I blow out a pool heater with compressed air?
Some manufacturers allow air to be used as part of winterization, but excessive pressure can damage pool equipment. Follow the procedure and pressure limits specified for your heater.
Should I reinstall the heater drain plugs for winter?
Follow the manufacturer’s instructions. Some heaters are stored with drain plugs removed so any water that enters can escape.
The Bottom Line
Winterizing a pool heater isn’t complicated, but you need to be thorough.
The biggest mistake is assuming that removing the obvious drain plug means the entire heater is empty.
Drain the heater according to the manufacturer’s instructions, check the heat exchanger and plumbing, and pay particular attention to places where small amounts of water can remain trapped.
And don’t forget the pressure switch.
It’s a small detail, but in a freezing climate, small pockets of water can cause expensive problems.
Once that’s done, your heater can sit quietly until spring.
Related Articles:
- How to Winterize a Swimming Pool: Step-by-Step Guide to Prevent Freeze Damage
- Pool Winter Covers: Which Type Is Right for Your Pool?
- Hot Tub Winterizing: Step-by-Step Guide to Protect Your Spa From Freeze Damage
Written by Dan Harvickson (Founder of Last Mountain Tech) Pool and Spa Specialist